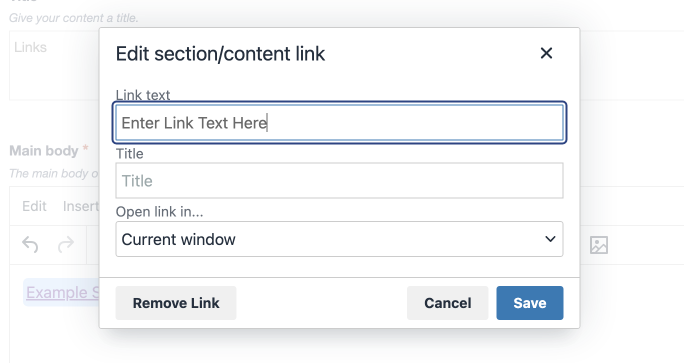
Most UMB websites are managed through a central content management system called TerminalFour or T4. The various websites managed by that shared content management system (including the central UMB website, The Elm, and the websites for each of the seven schools) use a different set of templates for their pages and content.

More information about the central UMB website can be found in the Website Manual.

Each school has a web leadership team that is separate from central administration. Please contact your website’s administrator for guidance specific to your school and template.

The following instructions will focus on the specific steps needed to manage each type of accessibility issue on most UMB websites. Before proceeding, please read Accessibility Foundations to gain a foundational understanding of each topic.

Color and Contrast

Most web editors will be working with templates that have already been designed with accessible colors and contrast requirements in mind.

It is therefore important that editors do not introduce nonstandard or custom colors or formatting that may disrupt the accessibility measures built into the templates.

Paste as Text

When copying text from another source (such as another website, a PDF, a Word document, or an email), and pasting it into T4, editors should turn on the "Paste as text" option to strip out all nonstandard formatting.

A screenshot showing the Paste as Text option

Before pasting, click the “Edit” button in T4’s text editor, and click “Paste as text.” “Paste as text” will then have a checkmark icon next to it, which confirms that the feature is turned on.

It’s not always obvious when pasted text includes nonstandard formatting, so it is best practice to use the “Paste as text” option every time.

Headings

Custom Headings

In T4’s editor, it is possible to add custom headings by clicking “Format” > “Formats” > “Headings.”

A screenshot showing the Headings tab

Which Heading to Use

For the central UMB website, the templates automatically reserve Heading 1 for the title of the page. Heading 2 is used by the template as the title for most content types. Therefore, if an editor wishes to add a custom heading to their text, it will usually be most appropriate to start at Heading 3.

A screenshot of Heading 1 and Heading 2 on the central UMB website

Other websites that use different sets of templates, such as the website for each of the seven schools, may have different headings reserved. Please contact your website”s administrator for guidance.

Images

Alternative Text

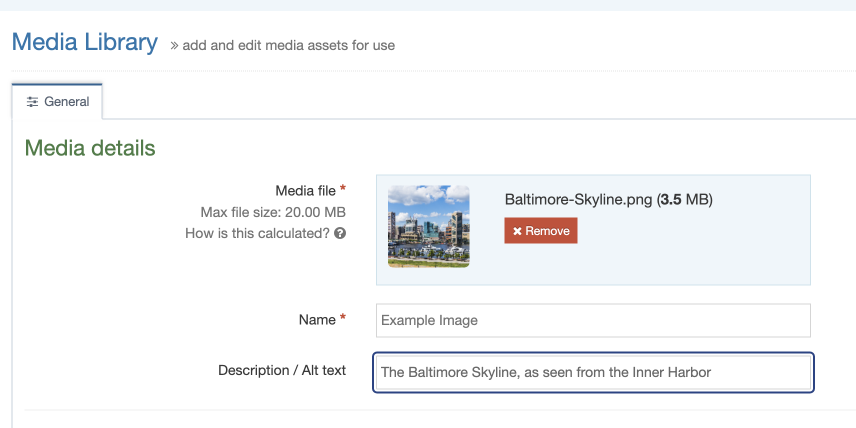
When adding images to T4’s Media Library, type appropriate alternative text in the “Description / Alt text” text box. The text you type into that text box will be output as accessible alternative text for the image.

A screenshot showing the Description field, where alternative text should be entered in the Media Library in T4

In some T4 content types, you may see a text box for Alternative Text. This is especially true for content types where an image is directly uploaded to the content type, instead of being selected from the Media Library. If you encounter such a text box, be sure to enter appropriate alternative text.

Sizing

Sizing image files correctly also helps to maximize accessibility. Image sizes are context-dependent. For the central UMB website, recommended dimensions can be found on the Content Types pages of the Website Manual, or in the descriptive text that accompanies each field in the content type itself. For other websites, please contact your site’s administrator.

To resize an image, one option is to use image editing software on your computer (such as the Photos app for Windows, or Preview for Mac) to resize the image file before you upload it to the T4 Media Library. 

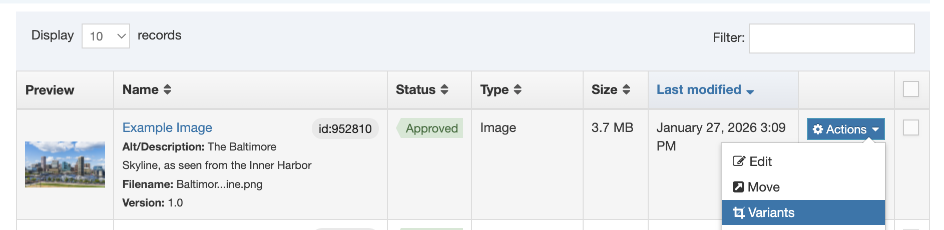
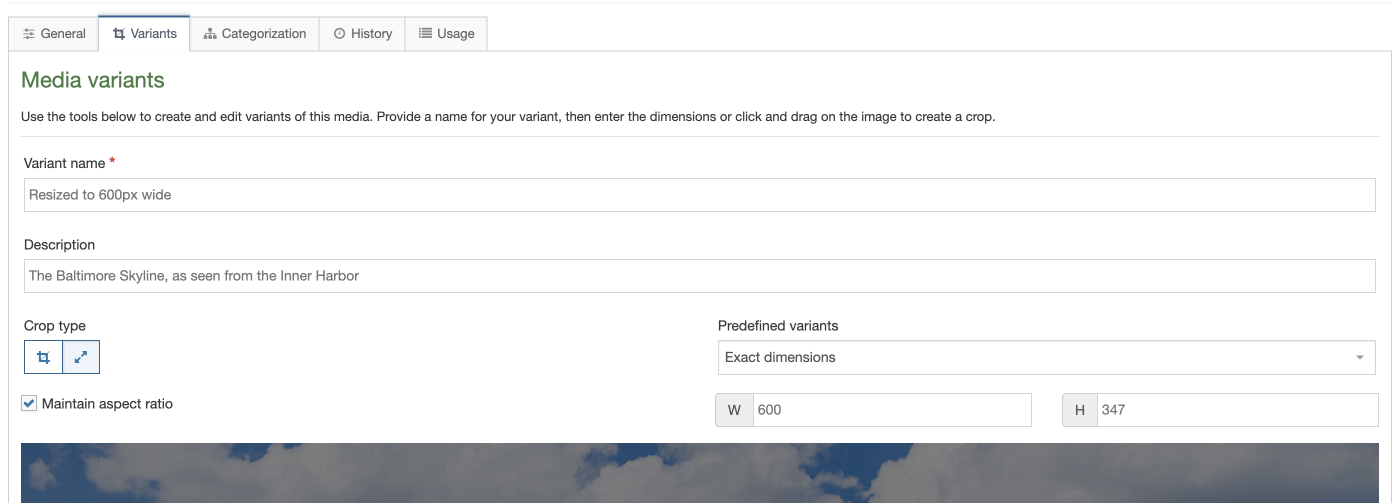
Another option is to use the Variants feature in the T4 Media Library. After uploading the original image file, navigate to it and click “Actions” > “Variants.” Enter an appropriate name in the “Name” text box, and enter alternative text for the “Description” text box. Under “Crop Type,” select “Resize.” Make sure the “Maintain aspect ratio” checkbox is checked. Type the necessary dimension into “W” (width) or “H” (height). Click “Save variant” to create the new resized variant, which will be now available for use in website content.

A screenshot showing Variants in the Actions drop-down

A screenshot showing the Variants interface

A large, high-resolution image can be resized to become smaller and lower-resolution. However, small, low-resolution images should never be resized to make them larger or higher-resolution. Also, web editors should never resize an image in such a way that distorts the image’s aspect ratio.

Links

Link Text for Media Links

To edit the link text of a T4 Media Link (for example, a link to a PDF from the Media Library) in the HTML editor, double-click the link to open the “Set media attributes” popup, and type the desired link text into the “Name” text box.

A screenshot of the Set Media Attributes popup

Link Text for Section and Content Links

To edit the link text of a section or content link in the HTML editor, double-click the link to open the “Edit section/content link” popup, and type the desired link text into the “Link text” text box.

A screenshot of the Edit section/content link popup

QR Codes

Avoid using QR codes on web pages. Screen readers cannot “scan” a QR code embedded in an image.

Tables

Creating a Table

To create a table with row and/or column headings in T4, click “Table” > “Insert table with column headings” or “Table” > “Insert table with row or column headings.”

A screenshot of the Insert table with column and row headings menu

Editing Header Cells

To edit whether a cell is a header cell or regular cell, select it and right-click it, then select ”Cell” > ”Cell properties.” For ”Cell type” select ”Cell” or ”Header cell.” For header cells, the ”Scope” property can be used to indicate whether this cell is a header for the row or column.

Header cells must have a scope other than ”None.” If you used the ”Insert table with column headings” or ”Insert table with row or column headings” options, those header cells will automatically have the appropriate scope applied. However, if you designate additional header cells with ”Cell properties,” you will need to assign a ”Scope” property for those cells.

Leave style options (Width, Height, Horizontal Align, and Vertical Align, etc.) blank to ensure consistent and responsive formatting.

A screenshot of the Cell properties option in the menu that appears after right-clicking a cell

A screenshot of the Cell Properties modal window, including options for Cell type and Scope

Editing Header Rows

To edit whether a row is a header row or regular row, select the row and right-click it, then select “Row” > “Row properties.” For “Row type” select “Header” or “Body.” The cells in a header row also should be designated as header cells.

A screenshot of the Row Properties modal window, including an option for Row type

Video, Audio, and Embedded Media

Videos

Videos on platforms such as YouTube must follow the guidelines for captioning, etc., outlined on the Social Media page.

On the central UMB website, web editors should use content types such as Embedded Video or Video Gallery to embed a YouTube video on a webpage. For other websites, check with the website’s administrator. 

Iframes

An iframe must have an accessible title attribute that describes its contents. For example: <iframe title=“Title Goes Here” src=” …

Third-Party Embeds

All third-party platforms, software, or plugins must be vetted for accessibility using the IT Procurement Compliance and Security Form.